Planting Carrots in Pots – A Complete Guide
Guide for Planting Carrots in Pots
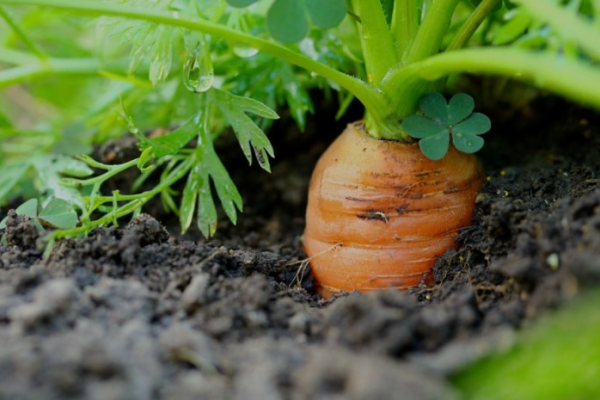
Today, let us learn the planting carrots in pots. Carrot whose scientific name is Daucus Carota is a biennial plant which belongs to the family of Apiaceae and is also herbicious. This will also produce a taproot which is edible. The carrot plants will need cool temperature to moderate temperature and these cannot be grown in summer especially in the regions which are usually warm. Hence growing carrots in winter would be helpful. Carrots will need soil which is loose and also packed. If the space in your garden is limited, you can choose to grow carrots in pots. Most of the carrots which have standard length will not be able to grow so long in pots, only the carrot varieties which are small can survive in them. Always ensure that the pot you are using to grow carrots is deep and also allows the root to grow in a good manner into the soil and keep the soil moist in order to increase the growth. For home gardening of carrots, one must have good knowledge of planting carrots in pots.
Preparation of pot:
- Always choose a carrot variety which is shorter. The carrot varieties which are smaller will be flexible for growth in a pot rather than the carrot varieties with a standard length. It is also a very good idea to select the varieties which have less time for maturing. Smaller varieties of carrots are like Romer, Thumbelina, Parisienne, Little finger. You also have options such as Shin Kuruda, Danvers half long, Parmex.
- Select a pot which is wide and has a depth of at least 1 foot. As carrots will grow underground, the root system will require more space for their growth. In the same way, you can grow more numbers of carrots depending on the width of the pot.
- The pot should have very good drainage holes for the prevention of additional water from damaging the carrots by causing rot.
- The type of pot is not a big deal as long as it has a sufficient amount of depth. You can use any type of pot which is made of clay, stone or plastic. The shape also depends on your decision, it can be circular or rectangular.
- If there are no drainage holes present on your pot, then you can start drilling your own drainage holes.
- Now, it is time to clean your pot with water and soap. If the pot is previously used for any other plant growth, you will need to scrub the pot internally before you start the plantation of your carrots. The eggs of microscopic insects and the bacteria will mostly hide in the used pots and these may reduce the growth of your carrots by infecting them.
- Choose a potting medium which is well-drained and loose. You can use both the soil and soilless mixtures. If you are interested in purchasing the soil, choose the one which is meant for the vegetables which are to be grown in pots. If you are purchasing the soil on your own, make sure that you are adding peat moss to it. It will make up to 50% of your soil. As an alternative, you can also add the horticultural sand to the potting medium and it will almost make 25% of the soil.
- You can also try by adding a mixture of red soil, compost which is decomposed and the sand which is added in similar proportions for a soil media you are making for yourself.
- You can also take into consideration the coco peat mixed with a little amount of perlite for a potting medium which has no soil.
- You can search and find all these components in your local garden stores, For help, you can also approach any sales agent.
- Now, the pot must be filled with soilless or soil medium. Please make sure that you are leaving at least 1 inch of space in between the medium’s top and pot’s rim. You can also add a slow releasing fertilizer to the soil, but you will need to select the one which has less content of nitrogen. The ratio can be 5-10-5. Nitrogen will help in the encouragement of the growth of leaf instead of the growth of carrots.
Plantation of carrot seeds:
- You can start planting the carrot seeds after the completion of the first frost if you are planting the carrots in the outdoor locations. The temperature preferred for the growth is around 13°C or it can also be a little bit warm. So it is always better to start the plantation in the early stages of spring. Anyways, the seeds will not do their best if the temperature is more than 29°C.
- The holes must be dug at a depth of a ½ inch. The carrots must have a distance of at least 1 inch between them. The plantation can be done apart if you would desire to. You can drop at least 2-3 seeds of carrot in one hole. The seeds of carrot are very small and are really difficult for plantation. If you drop a few seeds, that would be okay. You can prune the plants afterward as soon as they start sprouting.
- The holes must be completely filled with your potting medium. Make sure that you are not packing the medium into the holes. If you do so, there is a chance that your seeds get crushed. Rather than that, drop the soil medium in a light manner into each and every hole. Always ensure that you are filling all the holes. In a gentle manner, tap the soil down as soon as you are done.
- The seeds need to be watered in a thorough manner. You will need to add sufficient amount of water for making the medium wet. There is no requirement to make puddles, but the soil you are using should be wet when you touch. Just being moist is not sufficient. The seeds will require sufficient water to initiate the process of germination.
- You can make use of a sprayer so that there would not be any requirement to stir the seeds.
- Your pot has to be kept in full sun. Most of the carrot varieties will love to be in full sun. That means they will need full sun for a complete day. Select a place in your backyard or terrace which do not receive any shade in the day time where your carrots will get sufficient light for growing well. Always make sure that you are gaining some knowledge about the carrot varieties you are growing. For example, few carrots may like the partial sun.
Caring your carrots:
- The carrots need to be watered on a daily basis especially when the weather is warm. You may also require to water them two times a day at the time of sunny and hot weather. Make sure that you are not letting the soil to stay dry to any amount of time.
- Touch the soil with your finger to see if it is moist. If it is not moist, it means that it has to be watered.
- In most of the scenarios, tap water will work very well for carrots. Anyways, if the water which you are using is treated with a water softener, you should use distilled water.
- Your carrots have to be fed with fertilizer for one time in a week so that it would help in their growth. You can try the fertilizer with N-P-K ratio 5-10-10 where the nitrogen is less in content. This will help the roots to grow rather than the leaves. Anyways, it is not that required to use fertilizers for the growth of carrots.
- The carrots have to be thinned once they reach a height of 1 inch. Once they begin to grow into seedlings, you will need to remove any additional plants with the help of gardening shears or scissors. The carrot plants need to be spaced for about 3 inches apart so that it would help them in their growth.
- Please make sure that you are not pulling the seedlings which are unwanted as they would cause damage to the other carrot plants present in the pot.
- You can use some more amount of growing medium to solve any problems with growth. If you see that your carrots are leaning, you will need to make them straight in a gentle manner and add soil so that they get stabilized. In a similar way, if you see that your carrots are peeking through the soil’s top, you will have to cover them with some more amount of soil. When the carrots come out of the soil, they will turn into green color at the top. It will not cause harm to them, but they seem to be less attractive.
- Your carrots need to be sprayed with antifungal spray if you see any white mildew. The pot carrots will not be prone to pests and diseases, but there is a chance that they get few fungal infections depending on the time. You can see a substance which is white and powdery present on the leaves. You can also purchase antifungal sprays or prepare it on your own.
- Prepare a spray which is against mildew by mixing a tablespoon of baking soda to 4 liters of water with a pinch of liquid used for dishwashing. Stir it and apply to the plant with a spray bottle one time in a week.
Posted
2 years ago
No comments yet! Why don't you be the first?
Add a comment