Watermelon Growing Tips, Tricks, Ideas, and Secrets
Watermelon Growing Tips, Tricks, Ideas, and Secrets
Watermelon Growing Tips, Techniques, Ideas, and Secrets
Hello gardeners, we are back with a helpful topic today and the topic is all about watermelon growing tips, techniques, ideas, and secrets. Do you want to know all the basic and important watermelon growing tips and secrets? Well and then you will need to follow this complete article to know all the best tips for growing watermelon.
Introduction to Watermelon
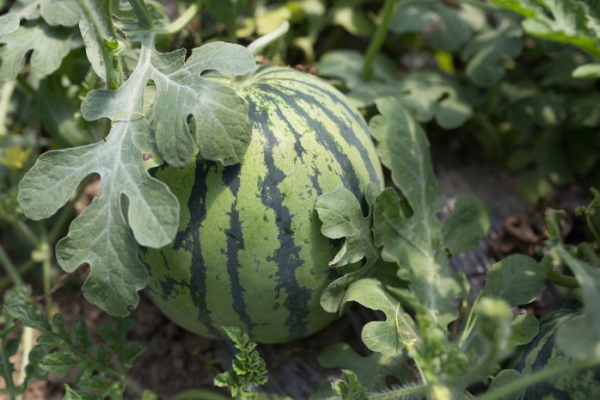
Watermelon is a flowering plant species and it belongs to the Cucurbitaceae family. A scrambling and trailing vine-like plant, it had been originally domesticated in Africa. It’s a highly cultivated fruit worldwide, with quite 1,000 varieties.
The watermelon may be a tender, warm-weather annual. Watermelons alongside muskmelons and even cantaloupes are sometimes called summer melons. You can grow watermelons within the warmest, frost-free time of the year.
A Guide to Watermelon Growing Tips, Tricks Ideas, and Secrets
Watermelon Varieties/Types
- Early or short-season varieties mature in 70 to 75 days:
Black tail Mountain – it is red flesh with a dark green rind. They weigh 6 to 12 pounds.
Faerie – it produces watermelons with red flesh and a yellow rind. They’re relatively very small fruits, at 5 to six pounds.
Golden Crown watermelons – they need red flesh and yellow rinds. They weigh 4 to 7 pounds.
Sugar Baby – it’s an excellent red-fleshed cultivar. Melons weigh 6 to 10 pounds.
- Long-season varieties usually mature in 80 to 85 days:
Ali Baba – it’s oblong-shaped melons with red flesh. Melons weigh 12 to 30 pounds.
Moon and Stars – it’s a hybrid plant with beautiful melons. Both red- and yellow-fleshed cultivars are available.
New Queen – it’s orange-fleshed melons with few seeds and high sugar content. They weigh 5 to six pounds.
So-called seedless varieties aren’t truly seedless, but the seeds are small, white, and edible. These are self-sterile hybrids. Seedless watermelons have a lower germination rate and are costlier than seeded watermelons, so starting them in peat or paper pots will offer you a small edge over starting them within the ground.
Revolution – it’s a red-fleshed melon that matures in 80 days. Melons are 20 to 26 pounds.
Super seedless – it’s red-fleshed melons that can harvest 90 to 95 days after sprouting. Melons are 16 to twenty pounds.
Sweet Bite – it’s red-fleshed melons that can harvest in about 75 days. Melons are 5 to eight pounds.
Triple Gold – it’s a yellow-fleshed melon that matures in about 75 days.
The Overview Table of Watermelon is Given Below
| Botanical Name |
Citrillus lunatus |
| Common Name |
Watermelon |
| Plant Type |
Annual fruiting vine |
| Sun Exposure |
Full sun |
| Size |
9 to 18 inches tall and 10- to 15-foot vine spread |
| Soil Needs |
Loamy, sandy and well-drained |
| Soil pH |
Slightly acidic to neutral that is 6.0 to 6.8 |
| Native Area |
Western Africa
|
1. Select the best variety of quality seeds for your climate and even location
In warm climates, most varieties do very well. Some favourites include Crimson Sweet and even Moon and Stars.
In hot summer climates, it is better to choose short-season varieties or types adapted to the heat of the summer such as Desert King and even Hopi Yellow.
In cooler climates, you need to choose short-season varieties such as Golden Midget and even Sugar Baby.
Have smaller growing space? Then choose shorter-vining varieties such as Mini-Love, Bush Sugar Baby, or even Cal Sweet Bush. These varieties usually can be grown in one 4×4 foot bed or less.
2. Choose and prepare a very good location for planting watermelon
Watermelon usually needs plenty of room. Some vines easily reach up to 20 feet or more. Give watermelon the space it needs to grow very well.
Amend the planting area with compost and even-aged manure. Then add a balanced organic fertilizer before planting.
Choose a location that gets plenty of sunlight to the plant.
3. Plant watermelon seeds directly in very warm soil
Watermelons do very well and best when directly sown once soil temperatures reach 21°C. You need to plant outside 2 to 3 weeks after your last frost date. Then sow 3 to 4 seeds 1 inch deep and 4 to 5 feet apart. Water very well with seaweed emulsion after planting. Thin to the strongest plant when the plants have 3 to 4 leaves.
If using square foot gardening, then plant shorter bush varieties and then plan on one plant taking an entire 4×4 foot bed.
In cooler climates, you need to start seeds indoors in 4 inches or larger pots 1 month before planting outside. Watermelon is very frost tender and then waits to plant if there is any danger of frost.
4. Water watermelon correctly for the good and best-tasting watermelon
Water very slowly and deep to allow watermelon roots to grow deep.
You should not get leaves wet. Wet leaves can encourage diseases such as powdery mildew.
As watermelon nears ripening, you need to cut back on the water to encourage sweetness.
5. Feed watermelon throughout the complete growing season
Once vines begin growing well and then better to feed with a balanced organic fertilizer.
When fruit sets on the plant, you need to apply a soil drenching of seaweed fertilizer.
6. Mulch the plant and then protect the fruit
Mulch plants very well to prevent weeds and conserve moisture.
Once the fruit is set, then you need to use cardboard or even a melon cradle to lift the fruit off ground to protect it from pests and even diseases. Growing vertically? Then it is better to use melon hammocks to support growing fruit.
7. Harvest at the right time
By knowing when a watermelon is ripe is often the most challenging part of growing them. Here are a few things you need to look for harvesting:
Three tendrils along the stem (going back to the root) end are brown, dry, hard, and even curled.
The underside of the watermelon usually turns creamy yellow or white.
Very low-pitched thump when you hit it very lightly – so, practice thumping unripe melons to hear the difference.
The sheen of the watermelon changes from slick to very dull looking.
Watermelon Soil Preparation Tips
- What type of soil do I need to grow watermelons?
Loamy
First, learn more about soil amendments and even preparing the soil for planting. Watermelons usually do best in loamy, somewhat sandy, and well-drained soil. Watermelons prefer a soil pH between 6.0 and 7.0 that is slightly acidic. Growing the vines in raised rows, referred to as hills, also ensures good drainage and it can easily hold the sun’s heat longer.
How deep does the soil get to be for watermelon?
Should I Grow Watermelon Seeds Or Plants? Watermelons need an extended season (at least 80 days) and warm ground for seeds to germinate and grow. Soil should be 21°C or warmer at planting time. You need to sow seeds 1 inch deep and keeps well watered until germination.
- Do watermelons like wet soil?
Watermelon develops a way more robust root age under drier conditions when the roots are forced to explore water deep within the soil. With constantly wet soil, roots lose the potential to grow deep.
Watermelon Planting And Spacing Tips
You need to sow watermelon seed 1 inch or 2.5cm deep.
Better to sow 4 to 6 melon seeds on a mound or hill.
Germination will occur in nearly about 10 days when the soil is 21°C.
Thin to 2 or 3 very strong seedlings on each hill when seedlings have developed three or four true leaves. Better to cut the thinned seedlings at soil level with scissors so as not to disturb the roots of the remaining seedlings.
Space the mounds or even hills 5 to 6 feet or 1.5 to 1.8m apart.
Mounds can also range in height from a few inches to more than 12 inches or 30cm tall and mounds will allow vines to run away down the slope. You can even train vines to circle the mound.
If you are growing watermelon in rows space plants 4 to 5 feet apart or 1.2 to 1.5m and then space rows 6 feet or 1.8m apart.
You can grow 2 watermelon plants for each household member.
Watermelon Watering Tips
Watering is extremely important—from planting until the fruit begins to make. While melon plants are growing, blooming, and setting fruit, they have 1 to 2 inches of water per week. Keep soil moist, but not waterlogged. Water at the vine’s base within the morning, and check out to avoid wetting the leaves and avoid overhead watering.
- When to Water Watermelons?
Watermelons need water throughout the season, but a very important time to water watermelons is while they’re setting and growing fruit. The rationale for this is often that watermelon fruit is formed from 92% water. This suggests that the plant must take up a huge amount of water while the fruit is developing. If enough water isn’t available to the plant during this point, the fruit won’t be ready to grow to its full potential and should become stunted or fall off the vine.
It is also important to be watering watermelons while they’re establishing within the garden or during times of drought.
- How to Water Watermelon Plants?
How to water watermelon is not complicated, but should be done perfectly. First, confirm you’re watering watermelons at ground level, instead of from above. Using drip irrigation instead of a system will help prevent mildew from developing on the leaves, and this can also stop dirt from splashing about, potentially spreading harmful diseases.
The second thing to remember when learning the way to water watermelon plants is that you simply got to water deeply. Watermelon roots go far checking out water to support the water-hungry fruit. Water the plants so that the water goes down a minimum of 6 inches into the soil. This might take a minimum of a half-hour, maybe even more counting on the drip rate of your watering system.
Watermelon Fertilizing Tips
- Watermelon Fertilizer Schedule
There is no set watermelon fertilizer schedule. Fertilizing is decided by the present soil condition and, thereafter, by the stage at which the watermelon plant is growing. For every instance, is it an emergent seedling or is it in bloom? Both stages have different nutritional needs.
When fertilizing watermelon plants, you need to use nitrogen-based fertilizer at the onset. Once the plant begins flowering, however, switch to feeding the watermelon phosphorus and potassium-based fertilizer. Watermelons usually require ample potassium and even phosphorus for optimal melon production.
- What Fertilizers to Use on Watermelon
How you’re getting to fertilize watermelon plants and what sort of fertilizer is best determined by a soil test before sowing or transplanting. Within the absence of a soil test, it’s an honest idea to use 5-10-10 at the speed of 15 pounds or 7 kg. Per 500 feet or 152 m. to attenuate possible nitrogen burn, mix the fertilizer thoroughly through the highest 6 inches or 15 cm. of soil.
Providing compost-rich soil at the onset of planting also will ensure healthy vines and fruit. Compost aids in improving the soil structure, adds micronutrients, and even aids in water retention. Amend the soil with 4 inches or 10 cm. of well-aged compost mixed into the highest 6 inches or 15 cm. of the soil before setting watermelon seeds or transplanting.
Mulching around the watermelon plants will improve moisture retention, retard weed growth, and slowly add nitrogen-rich organic interest to the soil because it breaks down. Use straw, shredded newspaper, or grass clippings during a 3 to 4 inch or 8 to 10 cm. layer around the melon plants.
Once the seedlings have emerged otherwise you can transplant, top dress with either 5-5-5 or 10-10-10 general all-purpose fertilizer. Fertilize the watermelon plants for 1 1/2 pounds or 680 g. per 100 square feet or 9 sq. m. of garden space. When fertilizing watermelons with granular food, don’t let the fertilizer inherit contact with the leaves. The leaves are sensitive and you’ll damage them. Water the fertilizer well therefore the roots can easily absorb the nutrients.
You can also apply liquid seaweed fertilizer when the foliage first emerges and then once the plants have flowered.
Just before or as soon because the vines begin to run, the second application of nitrogen is advisable. This is often usually 30 to 60 days from planting. Use a 33-0-0 fertilizer at the speed of ½ pound or 227 g. per every 50 feet or 15 m. of the watermelon row. Water the fertilizer in well. Fertilize again once the fruit has just emerged.
You may also side dress the vines before running with a 34-0-0 food at the speed of 1 pound or 454 g. per 100 feet or 30 m. of row or nitrate at 2 pounds or 907 g. per 100 feet or 30 m. of row. You will need to side-dress again once the fruit has just appeared on the vine.
You need to avoid using any nitrogen-rich fertilizer once the fruit has set. Excess nitrogen will just end in superfluous foliage and therefore the growth of the vine, and cannot nourish the fruit. An application of fertilizer that’s higher in phosphorous and potassium are often applied while the fruit is maturing.
Watermelon Pruning Tips
By using a very good pair of pruning or gardening shears, you need to remove any dead, diseased, yellowing, or infested leaves or even shoots at the joint where they connect to the main stem. Also, it is better to remove any secondary vines that are not bearing blooms or even look scrawny.
You should not prune the vines while wet. Watermelons are usually prone to parasites and even diseases, and pruning while damp or wet will also encourage their growth and spread.
Watermelon Pest and Disease Controlling Tips
Cucurbits should be rotated with another plant every 2 years to scale back levels of inoculum; plant debris should be far away from the sector as quickly as possible after harvest or ploughed deeply into the soil; applications of appropriate protective fungicides can help to slow the event of the disease; water plants from the bottom instead of from above to scale back periods of leaf wetness which are conducive to the event and even spread of disease
Any diseased plants should be removed and destroyed to stop further spread; plant debris should be removed after harvest or ploughed deeply into the soil to scale back inoculum
Do not overcrowd plants and better to avoid overhead irrigation, water plants from base; apply an appropriate fungicide
Plant in well-draining soils and avoid waterlogging; plant fungicide treated seed; rotate plants on a 4-year rotation
Use disease-free seed; treat seeds before planting; rotate plants every 2-3 years to a non-cucurbit to scale back disease build up in soil; reduce plant residue in soil by ploughing plant debris into the soil after harvest; application of preventative fungicides are usually required to regulate the disease successfully
Plant in sites with good air circulation and sun exposure; don’t overcrowd plants; sanitize equipment regularly
If aphid population is restricted to only a couple of leaves or even shoots then the infestation are often pruned bent to provide control; check transplants for aphids before planting and use tolerant varieties if available and reflective mulches like silver-coloured plastic can deter aphids from feeding on plants; sturdy plants are often sprayed with a robust jet of water to knock aphids from leaves; insecticides are generally only required to treat aphids if the infestation is extremely high – plants generally tolerate low and medium level infestation; insecticidal soaps or oils like neem or even vegetable oil are usually the simplest methods of control; always check the labels of the products for specific usage guidelines before use
Looper populations are usually held in restraint by natural enemies; if they are doing become problematic larvae are often hand-picked from the plants; an organically acceptable control method is that the application of Bacillus thuringiensis which is very effectively killing younger larvae; chemical sprays may damage populations of natural enemies and will and will be selected carefully
You need to remove all plant residue from the soil after harvest or a minimum of a fortnight before planting, this is often especially important if the previous plant was another host like alfalfa, beans, or even a leguminous cover plant and plastic or foil collars fitted around plant stems to hide rock bottom 3 inches above the soil line and increasing a few of inches into the soil can prevent larvae severing plants and even hand-pick larvae after dark; spread diatomite round the base of the plants (this creates a pointy barrier which will cut the insects if they struggle and crawl over it); apply appropriate insecticides to infested areas of garden or field if not growing organically
It is better to avoid planting next to onions, garlic, or even cereals where very large numbers of thrips can build up and use reflective mulches early within the season to discourage thrips and then apply appropriate insecticide if thrips become problematic
Posted
3 years ago
No comments yet! Why don't you be the first?


Add a comment